Kubernetes のサービスメッシュツール Istio を試してみる。
こんにちは k-jun です。今回は Kubernetes 環境などで名前解決、サービスメッシュに使用される istio を試してみます。
https://github.com/istio/istio
最近良く名前を聞くなぁぐらいでやってみることにしましたが、結構難しそうですね。README.md を参照すると、Istio は以下の2つで構成されているようです。
- Envoy - Sidecar proxies per microservice to handle ingress/egress traffic between services in the cluster and from a service to external services.
こちらはサービスメッシュを担当する Proxy の Envoy さんですね。サイドカーとしてくっついてくれるようです。
- Istiod - The Istio control plane. It provides service discovery, configuration and certificate management
Istio のコントロールプレーンであり、サービスディスカバリを担当します。
Setup
ドキュメントを参照すると、良さげなチュートリアルを見つけたのでこちらを参考に試してみることにします。
https://istio.io/latest/docs/setup/getting-started/
$ curl -L https://istio.io/downloadIstio | sh -
$ cd istio-1.11.4
$ export PATH=$PWD/bin:$PATH

$ istioctl install --set profile=demo -y
✔ Istio core installed
✔ Istiod installed
✔ Ingress gateways installed
✔ Egress gateways installed
✔ Installation complete
Thank you for installing Istio 1.11.  Please take a few minutes to tell us about your install/upgrade experience!  https://forms.gle/kWULBRjUv7hHci7T6
kubectl コマンド経由で namespace を追加し、デプロイまで行ってしまいます。
$ kubectl label namespace default istio-injection=enabled
namespace/default labeled

$ kubectl apply -f samples/bookinfo/platform/kube/bookinfo.yaml
諸々見てみますが、良さそうです。
$ kubectl get pods
NAME                              READY   STATUS    RESTARTS   AGE
details-v1-79f774bdb9-8jkwg       2/2     Running   0          20m
productpage-v1-6b746f74dc-j8bp4   2/2     Running   0          20m
ratings-v1-b6994bb9-kjnk2         2/2     Running   0          20m
reviews-v1-545db77b95-lms4f       2/2     Running   0          20m
reviews-v2-7bf8c9648f-642rr       2/2     Running   0          20m
reviews-v3-84779c7bbc-24p5k       2/2     Running   0          20m

$ kubectl get services
NAME          TYPE        CLUSTER-IP     EXTERNAL-IP   PORT(S)    AGE
details       ClusterIP   10.24.7.179    <none>        9080/TCP   20m
kubernetes    ClusterIP   10.24.0.1      <none>        443/TCP    28m
productpage   ClusterIP   10.24.12.121   <none>        9080/TCP   20m
ratings       ClusterIP   10.24.10.233   <none>        9080/TCP   20m
reviews       ClusterIP   10.24.12.68    <none>        9080/TCP   20m

$ kubectl exec "$(kubectl get pod -l app=ratings -o jsonpath='{.items[0].metadata.name}')" -c ratings -- curl -sS productpage:9080/productpage | grep -o "<title>.*</title>"
<title>Simple Bookstore App</title>
ここからが istio の出番です。現在外部公開されていないサービスを外部に公開していきます。このためにサービスメッシュの入り口を Istio Ingress Gateway を用いて公開していきます。
$ kubectl apply -f samples/bookinfo/networking/bookinfo-gateway.yaml

gateway.networking.istio.io/bookinfo-gateway created
virtualservice.networking.istio.io/bookinfo created

$ kubectl get svc istio-ingressgateway -n istio-system
NAME                   TYPE           CLUSTER-IP    EXTERNAL-IP      PORT(S)                                                                      AGE
istio-ingressgateway   LoadBalancer   10.24.1.213   34.121.233.158   15021:30454/TCP,80:32232/TCP,443:30434/TCP,31400:32235/TCP,15443:31426/TCP   39m
サービスにアクセスするために External IP を利用して環境変数を設定していきます。
$ export INGRESS_HOST=$(kubectl -n istio-system get service istio-ingressgateway -o jsonpath='{.status.loadBalancer.ingress[0].ip}')
$ export INGRESS_PORT=$(kubectl -n istio-system get service istio-ingressgateway -o jsonpath='{.spec.ports[?(@.name=="http2")].port}')
$ export SECURE_INGRESS_PORT=$(kubectl -n istio-system get service istio-ingressgateway -o jsonpath='{.spec.ports[?(@.name=="https")].port}'
$ export GATEWAY_URL=$INGRESS_HOST:$INGRESS_PORT
$ echo "$GATEWAY_URL"
34.121.233.158:80
大丈夫そうですね。ではいよいよダッシュボードをデプロイしてサービスメッシュ経由で接続してみます。
$ kubectl apply -f samples/addons
$ kubectl rollout status deployment/kiali -n istio-system

$ istioctl dashboard kiali

良い感じにダッシュボードが見れました。チュートリアルに従っただけですので、正直何もわかっていませんが Istio で何ができそうかということだけでもわかって面白かったです。 それでは今回はこのへんで。
Rust でフロントエンド開発!? Yew を試してみた。
こんにちは k-jun です。今回は、Rust 製のフロントエンドフレームワーク Yew を試してみます。
https://github.com/yewstack/yew
WebAssembly によるモダンな開発体験が魅力のようです。色々なところで Rust の名前を聞くことが増えてきました。 Javascript のように、果ては サーバーからモバイルまでどこでも Rust が使えるかもしれませんね。
Setup
サンプルコード を発見したので、ひとまずコレを動かしてみます。
$ git clone https://github.com/yewstack/yew-wasm-pack-minimal
$ cd yew-wasm-pack-minimal
$ cargo install wasm-pack
$ wasm-pack build --target web
...
[INFO]: 📦   Your wasm pkg is ready to publish at /Users/k-jun/source-code/yew-wasm-pack-minimal/pkg.
何やらファイルが、./pkg 以下に吐かれました。tree でディレクトリ構造を見てみると、wasm と js が生成されているようですね。
$ tree ./pkg
./pkg
├── LICENSE-APACHE
├── LICENSE-MIT
├── README.md
├── package.json
├── yew_wasm_pack_minimal.d.ts
├── yew_wasm_pack_minimal.js
├── yew_wasm_pack_minimal_bg.wasm
└── yew_wasm_pack_minimal_bg.wasm.d.ts
では、次に rollup コマンドでバンドルしていきます。rollup が入っていなかったので、ついでにインストールしました。
$ npm install -g rollup
$ rollup ./main.js --format iife --file ./pkg/bundle.js

./main.js → ./pkg/bundle.js...
created ./pkg/bundle.js in 79ms
python で適当なファイルサーバーを立ち上げて中身を見てみます。

ただの hello world じゃん。本当に動いているのだろうか... と思いましたが、以下のファイルをもとに Rendering がなされているようです。
https://github.com/yewstack/yew-wasm-pack-minimal/blob/master/src/app.rs
ということで、あとはこのファイルの編集方法さえわかればなんとかなりそうです。
https://yew.rs/ja/getting-started/build-a-sample-app
さっきより少しだけ複雑な記述内容を見つけたので、これで試してみます。

カウンターが爆誕しました...! 思ったよりフロントエンドっぽくて開発できそうでした。React というよりは、Unity に近い...? ということで、結構面白かったです。それでは今回はこのへんで。
Container 専用のデプロイツール Waypoint を試してみる。
こんにちは k-jun です。今回は、HashiCorp が開発している デプロイツール Waypoint を試してみようと思います。
https://github.com/hashicorp/waypoint
AWS、GCP、Azure、Kubernetes 果ては Nomad までの Deploy を管理できるツールのようですが、果たして。
Setup
こちら を参考にインストールしていきます。
$ brew tap hashicorp/tap
$ brew install hashicorp/tap/waypoint
$ which waypoint
/usr/local/bin/waypoint
Run
こちら を参考に、まずは簡単なものから試してみます。
$ waypoint install -platform=docker -accept-tos
お試しで使えるアプリケーションがあるようなので、コチラを clone します。
$ git clone https://github.com/hashicorp/waypoint-examples.git
$ cd waypoint-examples/docker/nodejs
では、waypoint コマンド経由で起動してみます。
$ waypoint init
$ waypoint up
» Building example-nodejs...
Creating new buildpack-based image using builder: heroku/buildpacks:20
Creating new buildpack-based image using builder: heroku/buildpacks:20
✓ Creating pack client
✓ Building image
 │ [exporter] Adding layer 'process-types'
 │ [exporter] Adding label 'io.buildpacks.lifecycle.metadata'
 │ [exporter] Adding label 'io.buildpacks.build.metadata'
 │ [exporter] Adding label 'io.buildpacks.project.metadata'
 │ [exporter] Setting default process type 'web'
 │ [exporter] Saving example-nodejs...
 │ [exporter] *** Images (22264e01b316):
 │ [exporter]       example-nodejs
 │ [exporter] Adding cache layer 'heroku/nodejs-engine:nodejs'
 │ [exporter] Adding cache layer 'heroku/nodejs-engine:toolbox'
✓ Injecting entrypoint binary to image

Generated new Docker image: example-nodejs:latest

» Deploying example-nodejs...
✓ Setting up network...
✓ Starting container
✓ App deployed as container: example-nodejs-01FKKF3P7J70A8PKMWFYQE50W6
✓ Docker image "example-nodejs:latest" up to date!

✓ Finished building report for Docker platform
✓ Finished building report for Docker network resource
✓ Finished building report for Docker container resource
✓ All 2 resources are reporting READY

» Releasing example-nodejs...
No release phase specified, skipping...

The deploy was successful! A Waypoint deployment URL is shown below. This
can be used internally to check your deployment and is not meant for external
traffic. You can manage this hostname using "waypoint hostname."

           URL: https://promptly-divine-peacock.waypoint.run
Deployment URL: https://promptly-divine-peacock--v1.waypoint.run[f:id:K-jun1221:20211104025742p:plain]

docker ps で確認すると container が確認できるので、 ローカルで起動していることは間違いなさそうです。
$ docker ps
CONTAINER ID   IMAGE                       COMMAND                  CREATED         STATUS         PORTS                              NAMES
0e7944d22fe6   example-nodejs:latest       "/waypoint-entrypoin…"   2 minutes ago   Up 2 minutes   0.0.0.0:55000->3000/tcp            example-nodejs-01FKKF3P7J70A8PKMWFYQE50W6
845eebe4dc0c   hashicorp/waypoint:latest   "/usr/bin/waypoint r…"   8 minutes ago   Up 8 minutes                                      waypoint-runner
816957fab970   hashicorp/waypoint:latest   "/usr/bin/waypoint s…"   8 minutes ago   Up 8 minutes   0.0.0.0:9701-9702->9701-9702/tcp   waypoint-server
では、destroy でもとに戻して他の機能も試してみます。
$ waypoint destroy -auto-approve
ここ を参照すると、Deploy 先の選択肢としては Lambda, ECS, Cloud Run が今の所あるようですね。 Kubernetes や Nomad もできるようですが、ここらへんは群雄割拠ですので今回は Cloud Run に Deploy してみようと思います。
ということで、ここ に従っていく。
$ git clone https://github.com/hashicorp/waypoint-examples.git
$ cd waypoint-examples/gcp/google-cloud-run/nodejs
デプロイする GCP の プロジェクトID を設定する。gcloud も必要になるようなので、存在しない場合は適宜インストールと設定を。 今回自分も諸々の設定が足りていなかったので以下のようにコマンドを実行。
$ sed -i -e 's/<my-project-id>/<YOUR_GCP_ID>/g' waypoint.hcl

$ gcloud services enable containerregistry.googleapis.com
$ gcloud auth configure-docker
$ waypoint init
$ waypoint up
...
» Releasing example-nodejs...


The deploy was successful! A Waypoint deployment URL is shown below. This
can be used internally to check your deployment and is not meant for external
traffic. You can manage this hostname using "waypoint hostname."

   Release URL: https://example-nodejs-6nrl32uqta-ue.a.run.app
良い感じにデプロイが完了したようです。コンソールから確認した限りでも大丈夫そうです。設定ファイルの中身を見ても簡単そうですし、イメージの Build と Push も自動でやってくれて便利そうです。 Waypoint 結構便利ですね。それでは今回はこのへんで。
Rust 製の JS 管理ツール VOLTA を使ってみた。
こんにちは k-jun です。今回は、JavaScript 製の cli なんかの管理ツール VOLTA を使ってみます。
https://github.com/volta-cli/volta
npm、yarn あたりがよく言われているのは install が遅いという点ですね...。これが Rust 製にしたことでもしかしたら解決するかも...? 一縷の望みをかけて使ってみます。
Setup
以下手順に従ってインストールして行きます。
https://docs.volta.sh/guide/getting-started
$ curl https://get.volta.sh | bash
$ which volta
/Users/k-jun/.volta/bin/volta
Run
それでは使ってみましょう。ディレクトリを検知して自動で参照する package の version を変えてくれるらしいのでやってみます。 例えば、
$ pwd
/tmp/a
$ volta install node@16.13.0
$ node -v
v16.12.0
と
$ pwd
/tmp/b
$ volta install node@16.12.0
$ node -v
v16.12.0
え、だめじゃん。どうやら、volta pin なるものを打たないと行けないらしい。コレによって、package.json に以下の値が挿入され version の固定ができるみたい。
{
  ...
  "volta": {
    "node": "16.12.0"
  }
}
うーん。package.json の engine で良くないか。正直いらん。他 サブコマンドもざっと漁ってもめぼしいものは無し。
$ volta --help
...
SUBCOMMANDS:
    fetch          Fetches a tool to the local machine
    install        Installs a tool in your toolchain
    uninstall      Uninstalls a tool from your toolchain
    pin            Pins your project's runtime or package manager
    list           Displays the current toolchain
    completions    Generates Volta completions
    which          Locates the actual binary that will be called by Volta
    setup          Enables Volta for the current user / shell
    run            Run a command with custom Node, npm, and/or Yarn versions
    help           Prints this message or the help of the given subcommand(s)
ということで、自分は使う意味を見いだせませんでした。有効な使用方法を知っている人は教えて下さい... ( )。 それでは今回はこのへんで。
Tiny Game Engine !? LittleJS を試してみる。
こんにちは k-jun です。今回は、極小のゲームエンジンライブラリ LittleJS を試してみます。
https://github.com/KilledByAPixel/LittleJS
README.md を見る限りでは、結構自由度が高そうです。2D に限定されているとはいえ、めちゃくちゃ重いはずの Game Engine が軽めに使用できそうでワクワクです。
Setup
github に全てのファイルが収まってるってすごいですよね。一旦 examples のディレクトリに格納されているゲームを遊んでみます。
$ git clone https://github.com/KilledByAPixel/LittleJS.git
$ LittleJS
$ python -m http.server 7777
http://localhost:7777 にアクセスしてみると、何やらパズルゲームが出迎えてくれます。

http://localhost:7777/examples/ に階層を降りると、ゲームディレクトリが並んでいます。一通り見てみる。

breakout

platformer

puzzle

stress
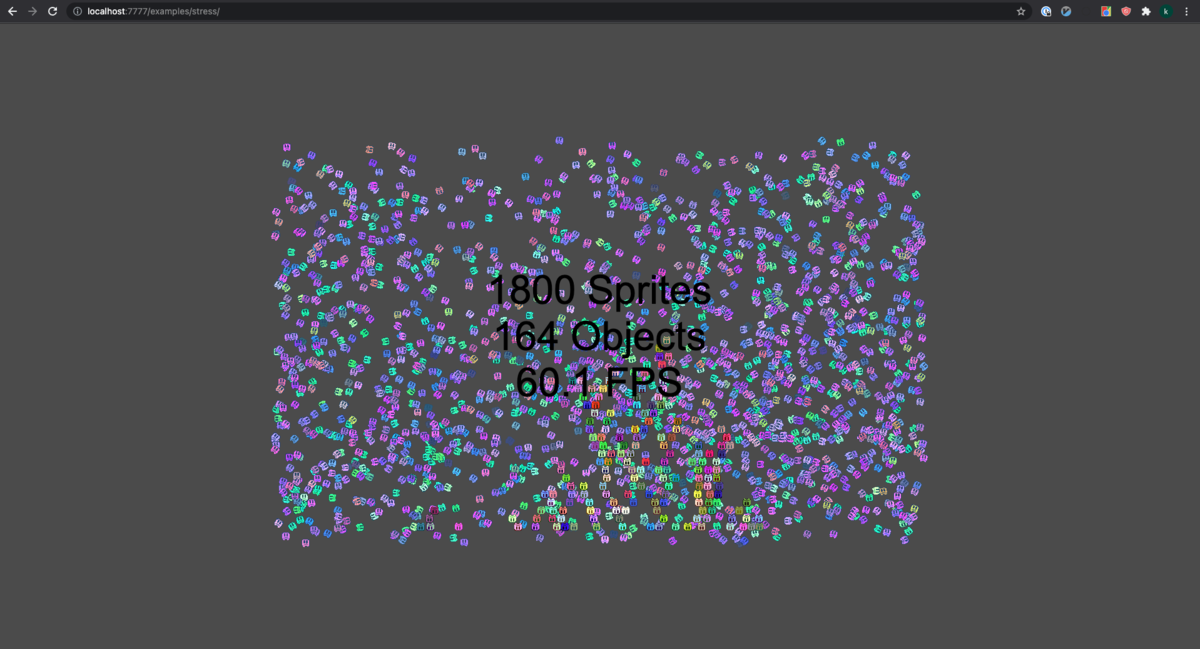
すごすぎ。特に platformer なんてどうやったらコレがあんなに小さいファイルたちで作れるのかわからないぐらいに完成度が高い。どうなってるんだ。
platformer の中身を見てみます。index.html の中身はこれだけ。
<html><head><title>LittleJS Platformer Example</title>
<meta name=viewport content=width=device-width,initial-scale=1,maximum-scale=1>
<link rel=icon type=image/png href=../../favicon.png>
</head><body>

<script src=../../engine/engine.all.js?53></script>
<script src=gameObjects.js?53></script>
<script src=gamePlayer.js?53></script>
<script src=gameEffects.js?53></script>
<script src=gameLevel.js?53></script>
<script src=game.js?53></script>
各種ファイルにそれぞれの設定が記述されているようです。驚くことにどのファイルも 400 行以下で記述されています。すごいなぁ。 精査してみていくと、どのゲームも以下のような構成で記述されているようです。gameUpdate() が 1秒間に 60 回程度実行され、ゲームを rendering しているようです。
/*
    LittleJS Hello World Starter Game
*/
'use strict';

///////////////////////////////////////////////////////////////////////////////
function gameInit()
{
}

///////////////////////////////////////////////////////////////////////////////
function gameUpdate()
{
}

///////////////////////////////////////////////////////////////////////////////
function gameUpdatePost()
{

}

///////////////////////////////////////////////////////////////////////////////
function gameRender()
{
}

///////////////////////////////////////////////////////////////////////////////
function gameRenderPost()
{
}

///////////////////////////////////////////////////////////////////////////////
// Startup LittleJS Engine
engineInit(gameInit, gameUpdate, gameUpdatePost, gameRender, gameRenderPost, 'tiles.png');
何か面白いものを作れればと思いましたが、僕の拙いゲーム力と、フロント力では何も生み出せませんでした...。 Unity などに詳しい方お願いします。それでは今回はこの辺で。
Docker 代替ツール podman を試してみた。
こんにちは k-jun です。今回は、Docker のような Container ツール podman を試してみようと思います。
https://github.com/containers/podman
Docker はかなり硬い地位を気づいているので、Container ツールとしての覇権は譲らないと思いこんでいました。が、podman もそれなりに名前を聞くようになってきたのでびっくりです。 どうでもいいですが、Kubernetes の Pod とはあまり関係がないらしいですね。
Setup
インストールはここに従います。インストール後には、podman machine init で podman の API を起動させていきます。
$ brew install podman
$ podman machine init
$ podman machine start
INFO[0000] waiting for clients...
INFO[0000] listening tcp://0.0.0.0:7777
INFO[0000] new connection from  to /var/folders/3b/7chj8jgx5z5g0cdh0szfv1b40000gn/T/podman/qemu_podman-machine-default.sock
Waiting for VM ...
 $ podman info | head
host:
  arch: amd64
  buildahVersion: 1.23.1
  cgroupControllers: []
  cgroupManager: systemd
  cgroupVersion: v2
  conmon:
    package: conmon-2.0.30-2.fc34.x86_64
    path: /usr/bin/conmon
    version: 'conmon version 2.0.30, commit: '
良さそうですね。
Run
getting-startedに従っていきます。search コマンドで nginx の image を検索した後に、pull してみます。
$ podman search nginx | head
INDEX       NAME                                       DESCRIPTION                                      STARS       OFFICIAL    AUTOMATED
docker.io   docker.io/library/nginx                    Official build of Nginx.                         15727       [OK]
docker.io   docker.io/jwilder/nginx-proxy              Automated Nginx reverse proxy for docker con...  2088                    [OK]
docker.io   docker.io/nginxinc/nginx-unprivileged      Unprivileged NGINX Dockerfiles                   54
docker.io   docker.io/nginx/nginx-ingress              NGINX and  NGINX Plus Ingress Controllers fo...  55
docker.io   docker.io/richarvey/nginx-php-fpm          Container running Nginx + PHP-FPM capable of...  818                     [OK]
docker.io   docker.io/privatebin/nginx-fpm-alpine      PrivateBin running on an Nginx, php-fpm & Al...  59                      [OK]
docker.io   docker.io/nginx/nginx-prometheus-exporter  NGINX Prometheus Exporter for NGINX and NGIN...  21
docker.io   docker.io/nginxdemos/hello                 NGINX webserver that serves a simple page co...  76                      [OK]
docker.io   docker.io/mailu/nginx                      Mailu nginx frontend                             9                       [OK]

$ podman pull nginx
Resolving "nginx" using unqualified-search registries (/etc/containers/registries.conf.d/999-podman-machine.conf)
Trying to pull docker.io/library/nginx:latest...
$ podman images
REPOSITORY               TAG         IMAGE ID      CREATED      SIZE
docker.io/library/nginx  latest      87a94228f133  2 weeks ago  138 MB
Docker と互換性があるはずなので、images も打ってみましたが大丈夫そうですね ! いよいよ起動させていきます。
$ podman run -dt -p 8080:80/tcp nignx
$ curl -s http://localhost:8080 | head
<!DOCTYPE html>
<html>
<head>
<title>Welcome to nginx!</title>
<style>
html { color-scheme: light dark; }
body { width: 35em; margin: 0 auto;
font-family: Tahoma, Verdana, Arial, sans-serif; }
</style>
</head>
実際に、起動していますね ! ということで、Docker コマンドのような扱いはできそうです。
Diff
見かけ上は Docker と podman はほとんど変わっていないように見えていますが、内部的には結構違うようです。
https://www.redhat.com/ja/blog/working-linux-containers-rhel-8-podman-image-builder-and-web-console
Podman was released with Red Hat Enterprise Linux 7.6 and 8.0 as the next generation of Linux container tools, is designed to allow faster experimentation and development of features.
Red Hat の v7.6 あたりで新しい container tool として開発されたようですね。OCI と呼ばれる Docker とは違った仕様に従っているようです。 内部的な仕様などかなり詳細に説明してくれていますが、ここでは Docker とは異なった別の仕組みで動いている。程度にとどめておきます。
Docker コマンドはそのまま podman に置き換えても動きそうなので、自由に変更できるプロダクトなどでは使ってみようと思います。 docker-compose も podman に plugin を導入することで扱えるようになるようですね! 面白そうです! それでは今日はこのへんで。
Reference
タイポを検出して指摘してくれる typos を試してみた。
こんにちは k-jun です。今回は、rust 製のタイポ検出ツール typos を試してみます。
https://github.com/crate-ci/typos
結構あるあるなんですよね。コードを書いていて、最初に変数を定義した人間がtypo をしており、あとに編集を加える人間はそれを根本から修正するのか typo に甘んじるのか悩むという... そんな状況が改善できると良いですよね...
Install
$ cargo install typos-cli
Run
手元のメモを溜め込んでいる repository が存在するので、そちらに実行してみます。
$ typos
error: `laod` should be `load`
  --> ./book/実践ハイパフォ−マンスMySQL/2-MySQLのベンチマーク/2.4-ベンチマークツール.md:8:7
  |
8 | * http_laod
  |        ^^^^
  |
error: `assing` should be `assign`
  --> ./book/Nginx実践入門/9-Luaによるnginxの拡張.md:149:15
    |
149 | ngx.va.uri = "/assing"
    |                ^^^^^^
    |
error: `calue` should be `value`
  --> ./book/Nginx実践入門/7-大規模コンテンツ配信サーバーの構築.md:68:68
   |
68 |     proxsy_cache_path /var/lib/nginx/cache/nginx levels=1 keys_zone=calue:4M inactive=1d max_size=100M;
   |                                                                     ^^^^^
   |
error: `UNCOMMITED` should be `UNCOMMITTED`
  --> ./book/実践ハイパフォ−マンスMySQL/1-MySQLのアーキテクチャと歴史/1.3-トランザクション.md:23:7
   |
23 | * READ UNCOMMITED
   |        ^^^^^^^^^^
   |
error: `CAHR` should be `CHAR`
  --> ./book/実践ハイパフォ−マンスMySQL/4-スキーマとデータ型の最適化/4.1-最適なデータ型の選択.md:54:22
...
ぐはぁ.... 大量に出てきました.... 辛い。どうやら自動修正もしてくれるようなので、実行してみます。
typos --write-changes
20 程度のファイルの typo が全部治りました...。ci として組み込んでおけば大量の typo を防止できそうです...。特に我々のような非ネイティブは typo に気づきにくいですからね。 こういうふうな自動検知は非常に大切です。それでは今回はこのへんで。